Wednesday, August 31, 2011

Summer Pasta


Did anyone else catch Rachel Ray today? I happened to catch the first 10 minutes and it is so great that I did! This morning I was thinking I need to use up some summer squash and some corn on the cob so this recipe played right into my plan. I did roast the squash instead of grilling because it was more convenient for me to be all in the kitchen and not having to run out to grill every few minutes. I also boiled my corn before cutting it off the ears.

Rachel Ray's Penne with Grilled Summer Squash and Sweet Corn

Friday, August 26, 2011

Zucchini "Spaghetti"


With the arrival of my new mandolin today, I am super excited to more efficiently chop, julienne, and deal with the overwhelming amount of produce in my house. First stop, Zucchini "noodles". I've been wanting to try this for a long time but considered it a huge time-suck. Truth be told, it would be without the mandolin! (Seriously, how many times do I have to mention it before you buy one, too?! :) And might I add, this is a GREAT spaghetti option for my g-free friends out there.


Zucchini "Spaghetti"


Ingredients:
-2 large zucchinis, peeled
-marinara sauce
-parmesan cheese
-fresh chopped basil
-toasted sunflower seeds

1. Use the "thin julienne" setting on the mandolin to cut both zucchinis into a colander.

2. Sprinkle the "noodles" with a bit of salt and let sit for 30 minutes to an hour. A lot of liquid will drain from the zucchini during this time.

3. Toss "noodles" in a pan over low to medium heat to warm the up; drain excess liquid.

4. Toss "noodles" with marinara sauce, top with cheese, fresh basil, and sunflower seeds.

Enjoy this absolutely GUILT-FREE, CARB-FREE pasta dinner!!

Grilled Watermelon Salad


Have an oversized watermelon in your house and tired of eating it raw? I NEVER would have thought cooked watermelon would be a good idea, but this turned out great! Even my soon-to-be kindergartener (who initially took one look at it and said, "Momma, I am NOT eating warm watermelon!") gobbled it up and asked for more after we coaxed her into taking just one bite. Who knew it was possible to make watermelon juicier and sweeter than it is raw!!

Grilled Watermelon Salad


Ingredients:

-Fresh cut wedges of watermelon
-Spring greens
-Feta cheese
-Balsamic vinegar
-Olives (optional)

1. Sear the watermelon on both sides on the grill (about 2 minutes on each side).

2. Serve topped with spring greens, feta cheese, and sprinkled with balsamic vinegar. (Can add olives if you so desire - my family does not!).

Squashamole


Hold on to your hats, friends. This. Is. A. Good. One. Seriously, this is something I will be begging for come oh say, February! SO MUCH summer squash and zucchini coming in these days, this is a great, delicious, and no-guilt healthy way to gobble it up!! Thanks for the inspiration, RR!!

Squashamole

Ingredients:
-Several small summer squash or zucchini
-2 small onions
-head of garlic, separated but not peeled
-olive oil
-toasted walnuts
-shredded parmesan cheese

1. Slice squash/zucchini and onions lengthwise, toss to coat in olive oil and sprinkle with salt.

2. Wrap garlic cloves (unpeeled) in foil.

3. Grill items from #1 and #2 on low to medium heat for 10-15 minutes, turning halfway through.

4. Combine in food processor: squash/zucchini from the grill, garlic squeezed from skins, toasted walnuts, and parmesan cheese.

5. Blend until smooth. Chill. Serve with tortilla chips.

Delish!

Thursday, August 25, 2011

Preserving Fresh Garden Herbs

If you're finding your garden overflowing with more fresh herbs than you can use or give away, try this handy preservation technique.

Step 1: Pick your herbs.


Step 2: Chop herbs and pack them into ice cube trays.


Step 3: Fill trays with water and put in freezer.


Step 4: Pop out your herb cubes and store in a freezer bag. Be sure to label your bags if you're preserving multiple herbs! When you're ready to use, just thaw on the counter or in the microwave on defrost.


All Things Pesto


'Tis the season for fresh herbs, especially basil at our house! You can Google pesto and come up with all kids of recipes and the basic variation is quite tasty. However, I usually take a few liberties in making pesto around here for a variety of reasons...

1. After being introduced to the concept of Spinach & Arugula Pesto, I began to broaden my horizons about what exactly can/should be included in pesto. Now, I tend to use all my "must go" greens when prepping a batch of pesto. I do try to have sweet basil make up at least 50% of the greens included, but I've been known to include carrot tops, spinach, spring greens, and arugula in any combination.

2. Pine nuts are expensive. I rarely use them and instead opt to include toasted walnuts or sunflower seeds. Both of these give an equally "nutty" flavoring and for what it's worth, I can't tell the difference (and neither can my pesto-devouring family).

3. Storage: Pesto freezes very well. Some would recommend omitting any cheese if you're going to freeze it (adding it once thawed) but honestly, I can't be bothered and include it in my frozen batches without complaint. I prefer to freeze pesto in ice cube trays; you can pop them out of the trays and into ziploc bags once frozen and each cube is a handy 1-serving portion.

Wednesday, August 24, 2011

Marinara

My notes for marinara are more of a process than a recipe, so I'm formatting this entry a bit differently. Marinara flavoring can really vary depending on personal taste, so feel free to add, delete, modify to your own preferences!


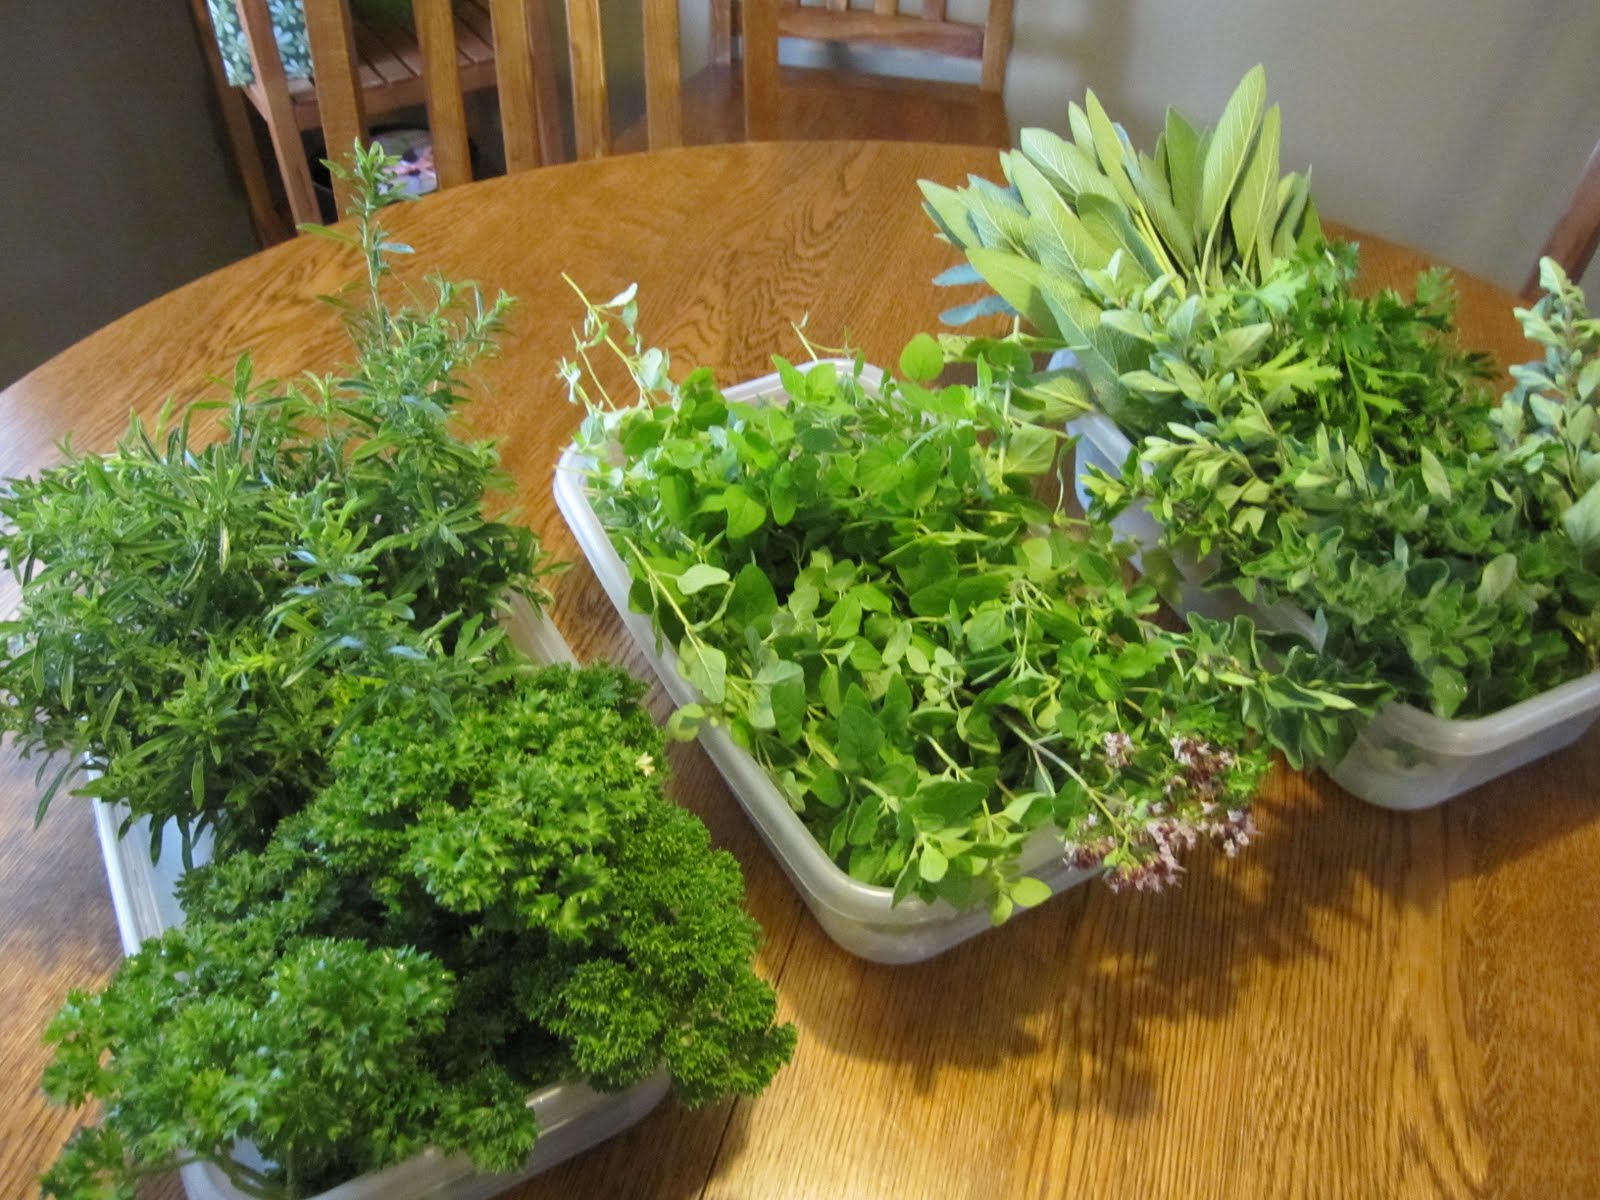
When life gives you lemons, make lemonade. When life gives you tomatoes . . . make marinara? Works for me. This is only a small harvesting from what's available in my garden and CSA at the moment so I've got a lot of cooking to do! (p.s. On another note, I have a bag full of lemons from the CSA in my fridge as well, maybe I should explore that homemade lemonade idea???)

1. Because I also had garden-fresh celery, carrots, and onions available, I started my marinara with a traditional mirepoix. I chopped the celery, carrots, and onion into very small pieces, added a head's worth of minced garlic and some olive oil. Put them over heat for 10ish minutes to let them soften and get the juices flowing.

2. I roughly chopped my tomatoes (for this batch, I used about 1 container pictured above). I like my marinara with bigger chunks of tomato, so that's how I cut 'em. You can dice yours finer if you prefer. Once chopped, add tomatoes to the mirepoix.

3. Add canned tomato sauce to achieve your desired thickness/thinness. I added 1 1/2 cans.


4. Add a generous amount of chopped fresh basil and oregano, brown sugar (I used 1Tbs for the whole pot), and salt/pepper. Let the pot simmer for 45-60 minutes. (Careful it is not boiling, just simmering.) As it simmers, taste and adjust herbs/seasonings until it tastes good to you.

5. When done, you can serve or freeze. See directions below for easy freezing.


Have you ever tried getting sauce from a pot into a ziploc? Not pretty. A good friend tipped me off to this easy and CLEAN method for freezing liquid goods. Shechele, if you're out there, thank you. My kitchen is cleaner because of you.

1. Take a ziploc bag and put it inside of a large measuring cup, folding the zipper over the edge. Use a mug to scoop sauce out of pot and into the bag.

2. Once full, zip most of the way closed, squeeze out excess air and lay flat on a cookie sheet. Put in freezer until solid. This makes the sauce super thin and stackable, great for long-term storage in an overcrowded freezer!

Monday, August 22, 2011

Celery Salt


After 3 very busy weeks around here, I am spending a full day in the kitchen trying to get on top of the bountiful harvest that has taken over my fridge and counter. First up, I have SO MANY cucumbers that I am thinking of making some pickles. My grandma sent me her recipe (blog post on that to follow later this week) and it requires celery salt. I don't have celery salt, but I do have fresh celery stalks with leaves from the CSA and a newsletter with a recipe. So . . . here is what I came up with, a super-easy, make-your-own celery salt!

Celery Salt

Remove the leaves from one bunch of celery (leaving the stalks for another use). Rinse with cold water and pat dry. Line a baking sheet with parchment paper and lay leaves on it in a single layer. Bake at 350 for 5-7 minutes until dry and crisp, but not brown. Remove from oven and let leaves cool on the tray. Once cool, crumble leaves with your fingers. Add an amount of salt equal to the amount of crumbled celery leaves; mix thoroughly. Store in an air tight container.

A fun tip about limp veggies: If your veggies get left in the crisper drawer a little too long and they start to feel limp or squishy, simply soak them in a bowl of cold water to rehydrate and they will crisp right back up. I've done it to carrots, cucumbers, and celery and it works great! Save your veggies!

Wednesday, August 17, 2011

Chocolate Zucchini Cake


With a garden and a CSA overflowing with zucchini harvest, what's a girl to do? There are only so many "healthy" dishes to be made. At some point, you have to help those veggies go sweet, right? :)


Chocolate Zucchini Cake

Ingredients:
-1/2c butter
-1/2c oil
-2 eggs
-1 tsp vanilla
-1/2 c buttermilk (or 1/2 c milk + 1/2 tsp lemon juice)
-1 3/4 c sugar
-2 1/2 c flour
-4 T cocoa
-1/2 tsp baking powder
-1/2 tsp salt
-1 tsp baking soda
-2 c pureed zuchhini

Preheat oven to 350. Grease 9 x 13 pan (or insert liners if making cupcakes). Mix all ingredients. Stir in zucchini. Pour into pan (or cups). Bake 40 minutes for a 9 x 13 pan or 18 minutes for cupcakes.

Optional toppings:
Add After Baking - Fruit, powdered sugar, cream cheese frosting
Add Before Baking - chocolate chips, brown sugar, walnuts

Simple Chicken with Fruit Salsa


This is a simple and seasonal. Enjoy!


Simple Chicken with Fruit Salsa


Ingredients:
-1 small melon, cut into 1/4" pieces
-2-3 pluots, chopped into 1/4" pieces (can sub peaches)
-Zest and juice of 1 lime
-fresh basil, chopped
-salt and pepper
-2-4 chicken breasts

1. Mix the melon, pluots, 1/2 the zest, all the juice, basil, salt and pepper together in a bowl to create a fruit salsa. Refrigerate to let the flavors mingle.
2. Rub the chicken with the remaining zest, salt and pepper. Grill until juices run clear.
3. Serve chicken topped with salsa. Great with a side of tortilla chips.

Dinner, Camping Style


It's not that I expect anyone to actually mimic this "recipe" but I thought it would be fun to post some about our recent adventures in camping. Our family is not the camping type, so to speak. For me, my lack of camping is more out of ignorance than disinterest. We buddied up with another family and headed out for 1 adventurous night. Can't wait to give it another {longer} go!

Dinner - Annie's Organic Macaroni and Cheese, mixed with CSA broccoli and of course, hot dogs.

Breakfast - Oatmeal, mixed with nuts, blueberries, and dried cranberries.

Yum! Yum!

Friday, August 12, 2011

My Formula for a Good Salad


I make a lot of salads. A lot. And when we're sharing a salad with friends I often get asked, "Is this on your blog?" I have a hard time responding to this because my salads are more a mix of whatever happens to be in my cupboard than any particular "recipe". However, my neighbor did an excellent job of summarizing my sub-conscience basic formula for putting a good one together - fruit + nut/seed + cheese = a good salad.

Fruits can be anything from dried cranberries, cut up apples or pears, fresh berries (as pictured here), dried blueberries, pomegranate seeds, fresh avocado, etc.

Nuts can be toasted or raw, almonds, walnuts, sunflower seeds, pumpkin seeds, pistachios . . . the list goes on and on.

Cheese options are endless. I usually buy the giant container of feta from Costco as that is our favorite!

Dressings: Someday, I hope to be excited about making my own, but for now I L-O-V-E the selections available at Trader Joes in the refrigerated section. Champagne Pear Vinaigrette / Cranberry, Walnut & Gorgonzola / Hummus Dressing! Other times, a simple sprinkle of olive oil and balsamic vinegar suites me just fine.

Protein: If you want to turn your salad into a meal (which we do often this time of year) then throw a protein up on top. Grilled chicken or steak are great options. A baked, yummy, coconut shrimp (also from Trader Joe's) is pictured here.

Monday, August 8, 2011

Mushroom-stuffed Zucchini


AAAhhhhh...... We are in that sweet spot of summer when it's cooled down enough to open the windows and turn on the oven but still warm enough to crave fresh, crisp produce straight out of the garden. Even better, my seasonal allergies haven't kicked in yet so I can still enjoy the amazing flavors!

For all you meat lovers out there, the mushrooms in this dish can easily be swapped out for ground beef, turkey, chicken, or sausage.

Mushroom-Stuffed Zucchini


Ingredients:
-1 large zucchini
-mushrooms, chopped
-2 sweet onions, chopped
-1 red pepper, chopped
-1 head of garlic, minced
-tomato sauce or marinara
-shredded cheese (I used a mixture of parm and motz)
-bread crumbs

1. Preheat oven to 400.
2. Cut the zucchini in half, the long way, and scoop out the seeds and center flesh until it looks like a boat. Shave the smallest amount possible off the non-cut side of each half so the zucchini will sit flat on the pan without rolling over.
3. Lightly brush a rimmed baking sheet and the zucchini with olive oil. Bake for 20-25 minutes, until tender-crisp.
4. Meanwhile, saute the chopped veggies and garlic in olive oil until soft.
5. When zucchini is done, remove from oven. Fill your cooked zucchini boats with the veggie mixture. Pour tomato sauce over the veggies. Top with shredded cheese and a dusting of bread crumbs.
6. Put assembled boats back into the oven until the cheese melts, then pop them in the broiler for about a minute to crisp up the top.

Saturday, August 6, 2011

Burger Bar


This last week we had my family over for dinner and I wanted to do a classic summer meal, but I also wanted to get a little creative and out-of-the-box. Here was my solution... Offer a burger bar with a variety of toppings. Nick also spiced up a few of the burgers as well. It was a hit!

Burger Bar


Grilled burgers:
We've really gotten used to the yummy flavor of a grass-fed organic ground beef. I highly recommend it.
Nick did plain burgers for most, but he did grill up a handful of patties that had chopped jalepenos and shredded cheddar mixed in - they were enjoyed by those who like a little spice!

Toppings:

Our bar included the following, but you could get really creative here. Post in the notes and let me know if you have any other ideas for unique toppings.
-Sliced cheddar
-Sliced swiss
-Lettuce
-Garden tomatoes
-Sliced jalepenos
-Salsa verde
-Guacamole
-Sauteed mushrooms

Salsa Verde


There is nothing like fresh salsa. Nothing. Period.


Salsa Verde


Ingredients:
-6-10 tomatillos
-1-2 small onions, quartered
-1 jalepeno, halved, seeded, and deveined*
-cilantro**
-1-2 cloves garlic, minced
-salt and pepper to taste

1. Remove the husks from the tomatillos and boil the fruit for about 5 minutes, until it softens.
2. Put all ingredients in the food processor and process until desired chunkiness/smoothness.
3. Refrigerate to chill.
4. Serve. Straight up with chips. As a sandwich/burger topping. Mixed with mashed avocados and lime juice to make guacamole. The options are endless.

*Unless you like it REALLY hot, then leave in the seeds and veins. That's where most of the heat lives.

**I didn't plan my garden as well this year when it comes to cilantro. Ours is all gone to seed before our tomatoes are in :( I do like this freeze-dried option in a pinch, available at your local grocer.

Roasted Ratatouille


Hello, readers! I'm feeling kind of bad because I haven't been doing much posting. Truth is, with the abundant harvest from our garden and CSA paired with the super hot temps, I haven't been doing a lot of cooking. We've simply been enjoying the fresh produce straight from the earth - yum yum! This one, however, is an awesome dish when you care to taste some of that summer harvest cooked up.

Roasted Ratatouille

Ingredients:

-1 eggplant, chopped
-1 zucchini, chopped
-2 large tomatoes, chopped
-1 sweet onion, chopped
-1 red pepper, chopped
-1 green pepper, chopped*
-head of garlic, minced
-olive oil
-Small cut pasta
-Marinara**

1. Preheat oven to 450.
2. Toss all chopped veggies in a large bowl with garlic and olive oil until coated.
3. Spread coated veggies on a rimmed baking sheet and roast for about 22 minutes.
4. Meanwhile, boil pasta to desired tenderness, and once done mix the cooked pasta with the marinara.
5. To serve, mix pasta & sauce with roasted veggies and top with fresh basil and parmesan cheese.

*If you want to add some heat to this dish, you could use a chile pepper instead. I'm not able to do that since my kiddos won't go for it. I used an Italian Frying Pepper we got from our CSA this week.

**There are lots of ways to achieve this... You can make your own from scratch (my personal favorite recipe for doing so will be forthcoming once our tomato harvest is in full swing!), you could buy the jarred version at the store, or when you realize you have neither of those available, you can mix in 1 can of diced tomatoes and 1/2 can of tomato sauce.

Grilled ratatouille? As I was completing dinner my husband walked through the kitchen and said to me, why didn't we grill these instead of turning on the oven? Great question. Grilled ratatouille would be equally delicious. You could skewer the veggies, baste them olive oil and garlic, then serve as noted above. Next time...